Telegram
Telegram is a cloud-based mobile and desktop messaging app with a focus on security and speed. For me, Telegram - is not just a messenger. It is the first app I open in the morning to read the news. And I am making a significant part of daily communication with Telegram. Plus, it is a developer-friendly service with an open API, so you can create your own clients and apps. More than, Telegram creators are encouraging it and have published a library to speed up that process.
Bots
Bots are third-party applications, hosted on your own server and run inside Telegram. Users can interact with bots by sending them messages, commands and inline requests. You implement the whole bots' logic and control their interaction with users using HTTPS requests to Telegram's Bot API. For example, if you have a website and monitor its availability. You can write a simple bot that will send you an alert if it's offline. There is a nice article about bots on the official website
Creating a bot
To create your own bot, you need to message a special bot - BotFather. In this article, we will create our own bot, that will implement a to-do list app. It should:
- keep user's notes in the database
- delete expired items (let's say that 1 hour is the expiry period)
- be able to fetch and send the whole list of saved notes
So, let's talk to BotFather:

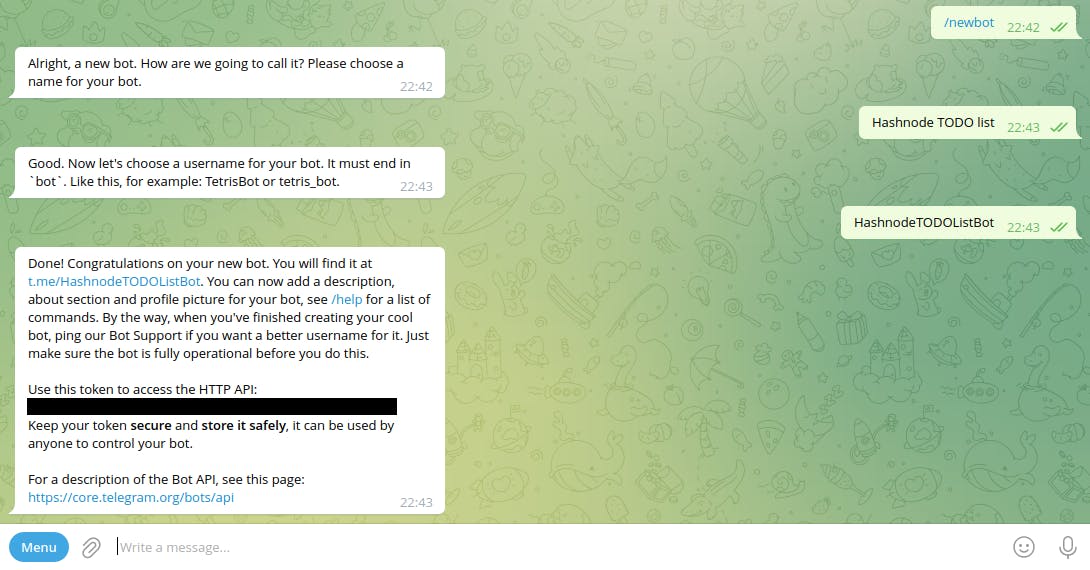
Now, we have a bot token, it's everything we need. Let's dive into the code. Important code listings will be provided during the article. The whole repo link is at the bottom.
GINO ORM
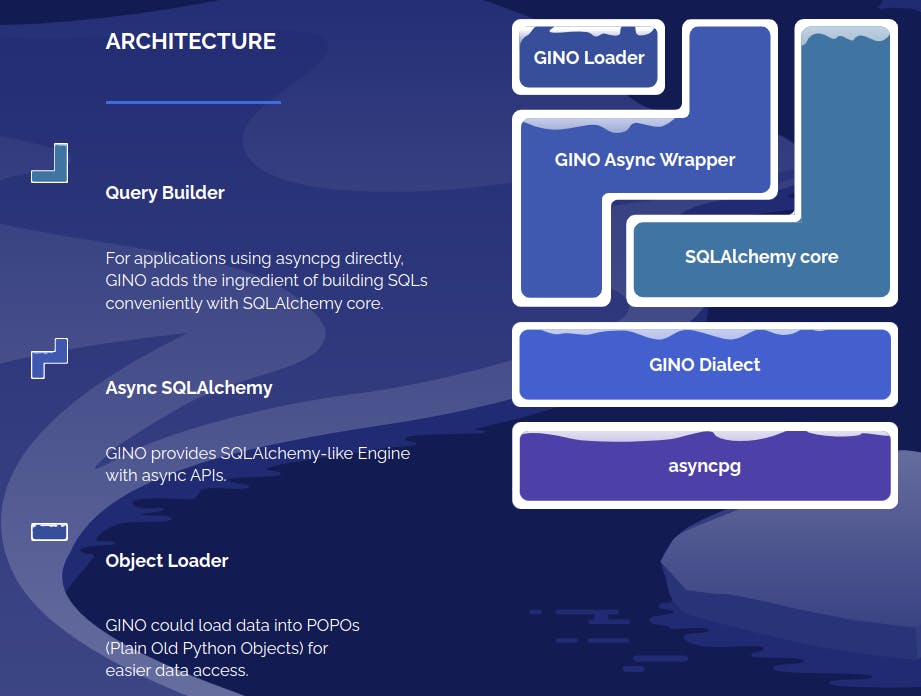
First, let me introduce you to the other subject of this article - GINO ORM. Gino is a lightweight asynchronous ORM built on top of SQLAlchemy core for Python asyncio. GINO 1.1 supports PostgreSQL with asyncpg, and MySQL with aiomysql.
Create a new poetry project and add the required dependencies:
poetry new hashnode-todo
cd hashnode-todo
poetry add python-dotenv aiogram gino emoji
Then let's create models.py (and I would prefer to rename the project folder to "bot"):
from gino import Gino
from sqlalchemy import func

db = Gino()


class User(db.Model):
    __tablename__ = 'users'

    id = db.Column(db.Integer, primary_key=True)
    telegram_user_id = db.Column(db.String(length=200))
    created_at = db.Column(db.DateTime(timezone=True), default=func.now())
    first_name = db.Column(db.String(length=255))
    last_name = db.Column(db.String(length=255))
    username = db.Column(db.String(length=255))


class Note(db.Model):
    __tablename__ = 'notes'

    id = db.Column(db.Integer, primary_key=True)
    user_id = db.Column(db.Integer, db.ForeignKey('users.id'))
    created_at = db.Column(db.DateTime(timezone=True), default=func.now())
    text = db.Column(db.Text)
Also, we need to define a settings file:
import os
from dataclasses import dataclass
from dotenv import load_dotenv


load_dotenv()


@dataclass
class Settings:
    DATABASE_CONNECTION: str
    TELEGRAM_BOT_TOKEN: str


settings = Settings(
    DATABASE_CONNECTION=os.getenv('DATABASE_CONNECTION'),
    TELEGRAM_BOT_TOKEN=os.getenv('TELEGRAM_BOT_TOKEN'),
)
And simple .env file:
DATABASE_CONNECTION=postgresql://postgres@localhost/hashnode_todo
TELEGRAM_BOT_TOKEN=
Now we are ready to work with a database.
For this tutorial, we will initialize the database with gino.create_all() call. In real usage, the migration tool "Alembic" is recommended by GINO authors (and it was created by SQLAcheme author). Or you could assume, that other applications manage the database, so you only define the schema for the already existing database.
The database initialization file:
import asyncio

from bot.models import db
from config import settings


async def main():
    await db.set_bind(settings.DATABASE_CONNECTION)
    await db.gino.create_all()
    await db.pop_bind().close()


if __name__ == '__main__':
    asyncio.get_event_loop().run_until_complete(main())
Now you can run it with poetry run python bot/create_models.py
GINO queries
Let's think about the functions list, that we gonna need. And we know, that Telegram always has the user_id to identify the sender. So we need:
- add_note(user, text)
- get_notes(user)
- process_expired_notes()
And the simple service code with all required basic operations:
from datetime import datetime, timedelta
from typing import List

from bot.models import User, Note


async def add_note(user: 'User', text: str) -> 'Note':
    return await Note.create(
        user_id=user.id,
        text=text
    )


async def get_notes(user: 'User') -> List['Note']:
    return await Note.query.where(Note.user_id == user.id).gino.all()


async def process_expired_notes():
    await Note.delete.where(
        Note.created_at < datetime.now() - timedelta(days=1)
    ).gino.status()
Now we have all database management functionality, and we can use it in the bot
aiogram
aiogram is a pretty simple and fully asynchronous framework for Telegram Bot API written in Python 3.7 with asyncio and aiohttp.
If your bot needs to handle many requests, then asynchronous is your parachute.
Basic bot
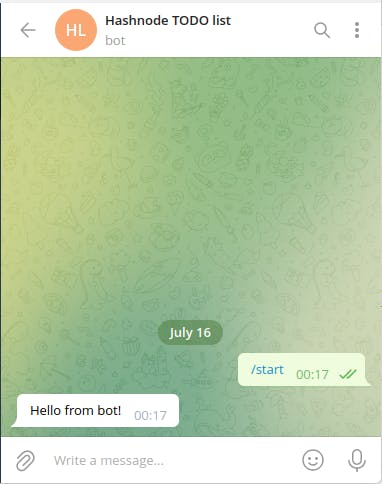
Let's start with a simple bot, replying with "hello" on your /start command.
The proposed structure is probably not ideal, but very scalable. I use it in some complex projects.
First, we need a base runner file main.py in the project root:
from aiogram import executor

from bot.models import db
from bot.main import dispatcher
from config import settings


async def on_startup(dispatcher):
    await db.set_bind(settings.DATABASE_CONNECTION)


async def on_shutdown(dispatcher):
    await db.pop_bind().close()


if __name__ == '__main__':
    executor.start_polling(
        dispatcher=dispatcher,
        skip_updates=True,
        on_startup=on_startup,
        on_shutdown=on_shutdown,
    )
And file for dispatcher and importing dialogs (bot/main.py):
from aiogram import Bot
from aiogram.dispatcher import Dispatcher
from config import settings


bot = Bot(token=settings.TELEGRAM_BOT_TOKEN)
dispatcher = Dispatcher(bot)
Dispatcher.set_current(dispatcher)


import bot.dialogs
Finally, the first dialog file for the "start" command:
from aiogram import types
from aiogram.dispatcher import Dispatcher


dp = Dispatcher.get_current()


@dp.message_handler(commands=['start'])
async def start_handler(message: types.Message):
    await message.answer('Hello from bot!')
Then just run it with poetry run python main.py
Now our simple bot can send the simple answer:
Middlewares
Middlewares are called on every message, so you can do throttling, logging or add variables to all future handlers. Let's add a middleware, that will get or create a user in the database.
First, adding a new service with one function - get_or_create_user:
from bot.models import User


async def get_or_create_user(
        user_id: str,
        first_name: str,
        last_name: str,
        username: str,
) -> ('User', bool):
    created = False
    user = await User.query.where(User.telegram_user_id == user_id).gino.first()
    if not user:
        user = await User.create(
            telegram_user_id=user_id,
            first_name=first_name,
            last_name=last_name,
            username=username
        )
        created = True

    return user, created
Second, the middleware itself:
from aiogram import types
from aiogram.dispatcher.middlewares import BaseMiddleware

from bot.services.users import get_or_create_user


class UserStorageMiddleware(BaseMiddleware):
    def __init__(self, database):
        self.database = database
        super().__init__()

    async def on_process_message(self, message: types.Message, data: dict):
        user = message.from_user
        db_user, _created = await get_or_create_user(
            user_id=str(user.id),
            first_name=user.first_name,
            last_name=user.last_name,
            username=user.username
        )
        data['user'] = db_user
Pay attention to conditionally-added variables to the data dictionary. If for some reasons, the 'user' is not set in the middleware, and you are declaring it in the handler, you will get an exception!
Third, add this middleware to the dispatcher:
dispatcher = Dispatcher(bot)
Dispatcher.set_current(dispatcher)

dispatcher.middleware.setup(UserStorageMiddleware(database=db))
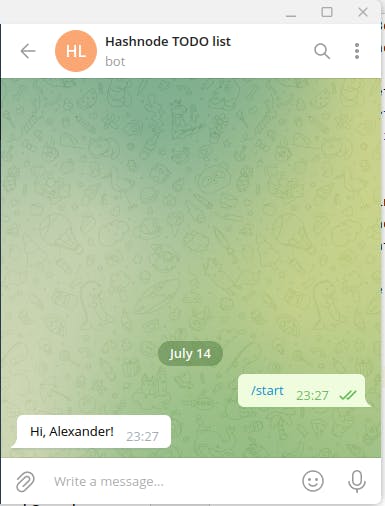
And you can now use the user variable in handlers. Let's make our bot reply with the user's first name:
@dp.message_handler(commands=['start'])
async def start_handler(message: types.Message, user: 'User'):
    await message.answer(f'Hi, {user.first_name}!')
Keyboards and state
Keyboards are the last thing we need to implement for the planned note-taking bot. They allow you to show pre-defined actions and easily interact with the bot in one tap.
Let's add a file with a function to return the keyboard (bot/keyboards.py):
from aiogram import types
from aiogram.utils.emoji import emojize

from bot.texts import KEYBOARDS


def main_keyboard() -> types.ReplyKeyboardMarkup:
    markup = types.ReplyKeyboardMarkup(resize_keyboard=True)
    markup.row(
        types.KeyboardButton(emojize(KEYBOARDS['list_notes'])),
        types.KeyboardButton(emojize(KEYBOARDS['add_note']))
    )
    return markup
And a small file with texts:
RESPONSES = {
    'welcome': 'Hello, {user}, I am note taking bot for hashnode',
}

KEYBOARDS = {
    'list_notes': ':spiral_notepad: List notes',
    'add_note': ':heavy_plus_sign: Add note',
}
Plus, modify the start command handler:
@dp.message_handler(commands=['start'])
async def start_handler(message: types.Message, user: 'User'):
    await message.answer(
        RESPONSES['welcome'].format(user=user.first_name),
        reply_markup=main_keyboard(),
    )
And that simple steps allow you to make the bot more interactive:
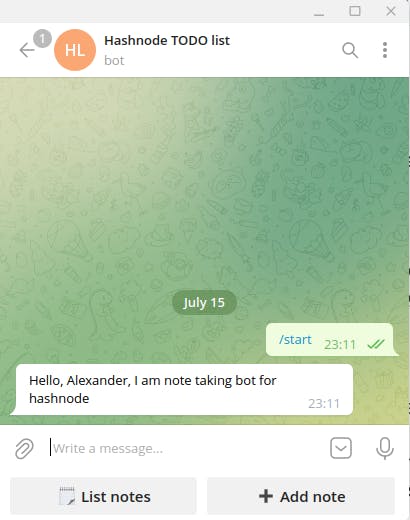
Just 2 more steps to finish! Stay tuned :)
Pressing the button just sends its text. So we can use the Text filter in the message handler, to catch that event. Based on that, let's add another dialog file (bot/dialogs/list_notes.py), which will return all your notes
from aiogram import types
from aiogram.dispatcher import Dispatcher
from aiogram.dispatcher.filters import Text
from aiogram.utils.emoji import emojize

from bot.texts import KEYBOARDS
from bot.models import User
from bot.services import notes as notes_service
from bot.keyboards import main_keyboard


dp = Dispatcher.get_current()


@dp.message_handler(Text(equals=emojize(KEYBOARDS['list_notes'])))
async def handler_list_notes(message: types.Message, user: User):
    notes = await notes_service.get_notes(user)

    if not notes:
        answer_text = "You don't have any actual notes"
    else:
        notes_text = '\n\n'.join([
            f'{n.created_at.isoformat()}\n{n.text}' for n in notes
        ])
        answer_text = 'Your notes:\n\n' + notes_text

    await message.answer(
        answer_text,
        reply_markup=main_keyboard()
    )
For adding notes - we gonna use the state. If any state is activated, only related handlers can process the message. So we need to declare the State class and a handler, that will set it. Plus, we gonna replace the keyboard, showing only one "Cancel" button:
class AddNoteState(StatesGroup):
    enter_text = State()


@dp.message_handler(Text(equals=emojize(KEYBOARDS['add_note'])))
async def handler_add_note(message: types.Message):
    await AddNoteState.enter_text.set()
    await message.answer(
        RESPONSES['add_note']['prompt'],
        reply_markup=cancel_keyboard(),
    )
Then we just define the handler for the state, which will save the entered text as a new note:
@dp.message_handler(state=AddNoteState.enter_text)
async def handler_note_text(message: types.Message, state: FSMContext, user: 'User'):
    await notes_service.add_note(user, message.text)
    await state.finish()
    await message.answer(
        RESPONSES['add_note']['success'],
        reply_markup=main_keyboard(),
    )
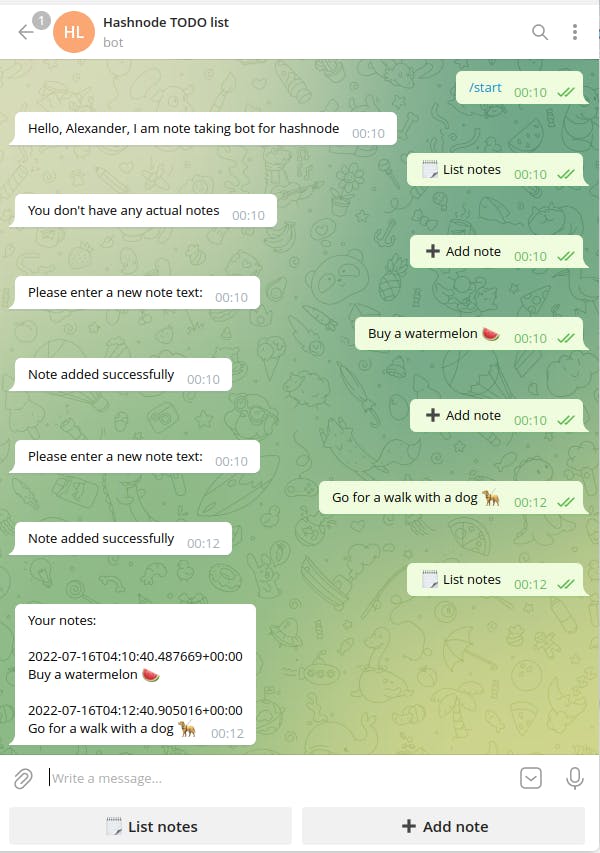
A full resulting bot interaction:
A full source code is available on GitHub

